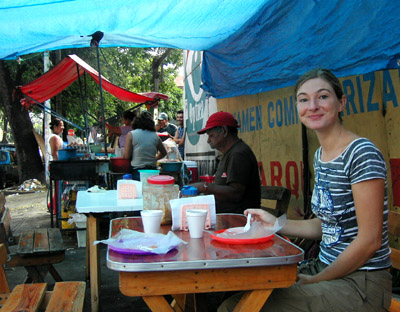
Knives on a Boat

Monday, July 9th, 2007

knives: Cutco Trimmer, Cutco Petit Carver, Shun Santoku, Shun Paring, Global Pro Paring

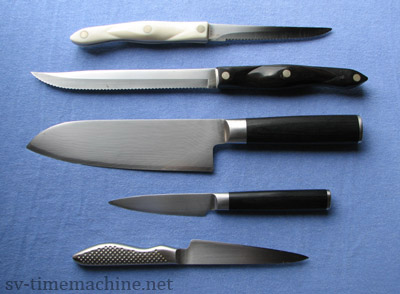
[Top to bottom: Cutco “Trimmer” (Small), Cutco “Petit Carver” (Meduim), Shun Santoku, Shun Paring, Global Pro Paring. Sorry, but I don’t have any photos of the fish knives.]

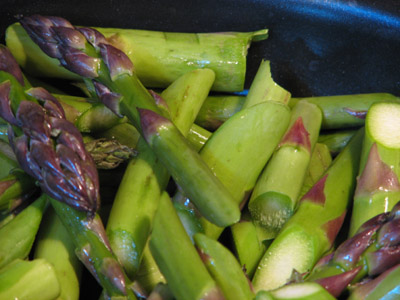
In preparation for Boat Life, I wanted durable, dependable, reliable knives. Knives that would be able to hold their edge yet be easy to sharpen when necessary. Not too large, not unwieldy, comfortable to grasp, easy to clean. I needed knives that could cook a hot meal underway in shite weather without even being told what to make. Knives that would serve me coffee with just the right amount of sweetened condensed milk syrup in my bunk. A tall order, really, when you think about it. Here’s what I came up with:

SHUN SANTOKU (6.5-inch)

This knife is beautiful; quite possibly the most beautiful knife I’ve ever seen that you can just run out and buy from, like, Amazon. It is the perfect length for a boat because there’s not a lot of space to get fancy in the galley of a 31-foot trimaran. This is a knife I purchased specifically to bring with us because the French chef’s knife I typically used at home was about seven feet long. I had never used a santoku style knife before but I thought they were cool, and I am always enthusiastic about experimentation with sharp objects. Hours and days of exhaustive research on the subject of santokus and Japanese knives later, I chose this one.

SHUN PARING

Amazon.com had a super deal on the paring knife if you bought the santoku. It didn’t take a lot of convincing in my case.

GLOBAL PRO PARING

There’s a story behind how we obtained this knife. We were in Tokyo (it was 2002) in the section of town where you can buy all that insane cookware and plastic sushi, and we wandered into a knife shop after seeing a display of Global knives. Now, we had had our eye on the Global Sashimi knife for probably two years but they are bloody expensive in the US and so we looked (much) but did not touch. In fact, we looked whenever we might, which is why we found ourselves sucked into this Tokyo knife shop even though we didn’t expect to be able to afford anything there either.

But! Fate!! A group of Danes entered and we all greeted one another enthusiastically after recognizing each other from the ferry earlier. We wandered around this tiny shop, which seemed to be more of a wholesale type place, not a standard retail. They were called Yoshikin and carried only Global knives, and they had every possible one made. Stacks of them. We got to chatting with the Danes; it turns out they were all Ericson employees and had a special arrangement with this company. They were there to buy knives at a corporate discount of 40% and they said we should pretend we were with them to get the same deal. The shop guy already assumed we were Danish Ericson Folk anyway and so we decided that this would probably work out for us.

We pored over the options (many) and selected the much-lusted-after sashimi knife and a paring knife, for the hell of it. (I didn’t have a paring knife at all at the time.) The shop had both Global regular and Global Pro knives and the shop guy politely and emphatically explained that the Global Pro were professional grade knives with better steel and a more elaborate crafting process, not that mass marketed stuff you can find in any high-end knife shop in Denmark (cough, or the US). They were more expensive (although not extremely so) but we figured that if we were going to splurge, we should go all out and get the fancy ones. The only visual difference was that the Global had a black patina in the handle bumps; the Global Pros did not.

We had a fun experience getting this sword-sized knife on the plane back to San Francisco, but that’s another story. This is also why we ended up on the boat with only the paring knife and not the sashimi knife. (Too big.)

SMALL CUTCO

This is a very versatile serrated knife and we’ve had it forever. I will not tell you how we got it. In its defense, it had always gotten used a lot.

MEDIUM CUTCO

For some stupid reason, I decided that we would NEED a bread knife but my regular bread knife is about 16 inches long. Which is to say, longer than the trimaran galley itself and a hazard. I compromised on this knife thinking I could deal with the small loaves of bread and carve a chicken too if the opportunity came up. Well, the first fresh bread of the trip didn’t hit our boat until Isla Guanaja; kind of pathetic but we don’t have an oven and I’m particular. I probably used it all of six times in 18 months.

MAJOR FISH KNIFE

I have dealt with precious little raw meat in my life and fish least of all. Once when I was 13 or something, we went to a lake on a family vacation and I put a pole in the water. Bored after about ten seconds, I abandoned it for a good 24 hours or more. When I finally wandered by again, a small trout was twitching on the other end. I freaked out and called for help. My grandmother, who I had assumed was on my side, came trotting down to the dock, snatched up the fish, yanked the hook from its mouth, produced a knife from her apron and sliced the head clean off in less than a second. She then kneeled down on the dock, cut the fish from gaping, bleeding hole to tail, stuck a finger in, yanked out a bit of stringy blobby guts and slung them out in to the lake where they slowly sunk to the bottom. Then she took the blade and scraped it across the dead body, like petting a cat the wrong way; scales popped and zinged all over her knees. The whole operation took probably 20 seconds. Thusly, I was the appalled bringer of the breakfast bacon. It was pan-fried and served alongside the more standard morning offerings but I think mom was the only one who actually ate it.

So, I knew fishing would be involved on this trip and knives would be needed to cut them up in special ways. The least I could offer was to do my part in shopping for such a knife and I went to a shop with a humongous display of knives and asked the knife person what she recommended. I think she had larger fish in mind. This knife was more useful as a pirate prop than a functional cutting device.

MINOR FISH KNIFE

A smaller six and a half incher is actually the fish knife we used. Jeff bought it for us in Ensenada after I nearly beheaded the binnacle showing off our pirate’s booty. Turns out that we tend to catch fish when we go at least six knots, and usually much faster; this means that the seas and weather conditions are often large and sucky. And, since I am still traumatized by the lake trout, Joshua is officially in charge of turning live thrashing fish into the delicious filet. The smaller knife just worked out better in that there was less leg to cut off if he missed.

THE VERDICT

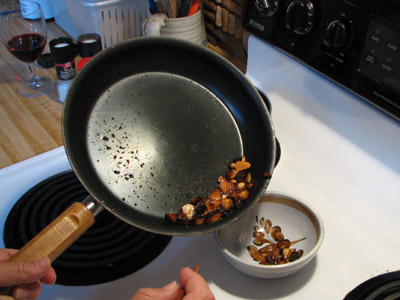
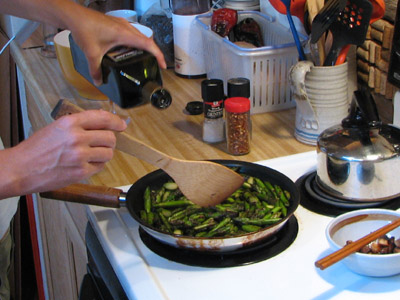
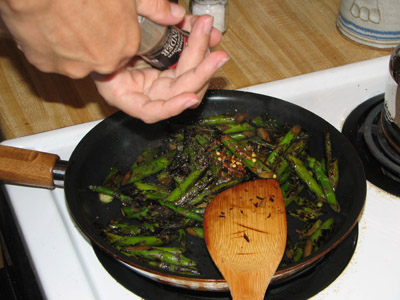
I used the Shun santoku and the Global Pro paring knife BY FAR the most. It is not an exaggeration to say the santoku was out every time any meal was prepared on the boat (twice per day for eighteen months). The major fish knife was almost never used, nor was the larger Cutco. The Shun paring was in third place and the small Cutco was a ways behind it. I think basically, only one paring knife was really necessary (an eighteen-inch galley is strictly a one-butt affair). Particularly interesting is the way the blades have held up to boat abuse. I did my best to take care of them but conditions on a boat are not always the most delicate. I wasn’t going to NOT use them for fear of damaging them.

The Global Pro steel held up excellently—far better than the Shun. Even the comparison between the two paring knives (the Global being more frequently used) shows that the Shun paring steel has a lot more wear. The Global pro knife shows almost no nicks but both the Shun knives have nicks running the entire length of the blade. I hate dull knives and so I have Joshua sharpen the knives whenever they won’t easily dice a tomato; we have very good stones (and sharpener) so I’m disinclined to say that the problem is due only to inexperienced sharpening. I probably don’t need to mention that I always use a cutting board—I favor a mesquite board—and the knives were stowed in a teak wall knife rack.
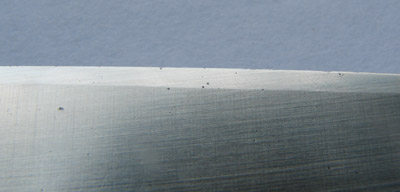
Behold the horror:

closeup of Shun santoku knife blade

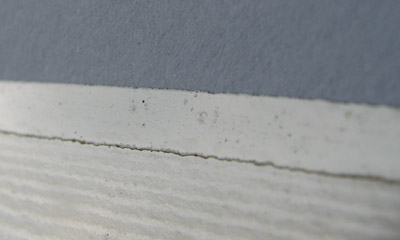
[This is a scary close up of the Shun Santoku. It is horribly pitted pretty much the entire length of the blade. I really hope I can send this to a professional and have the nicks ground out again because I dearly love this knife.]

closeup of Shun paring knife blade

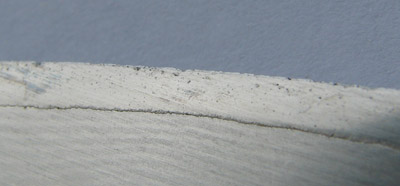
[The Shun paring knife. Man, these close ups make them look terrible!]

closeup of global pro paring knife blade

[The Global Pro paring knife, virtually free of nicks and looking great after the ordeal. This is the same scale of close-up as the above Shun photos, by the way. With some diligent sharpening, we can probably grind the few nicks out ourselves.]


Let’s Cooking On Land: Asparagus

Monday, May 14th, 2007

Asparagus

Among our first HEB purchases, once I recovered my dignity after dorking out over the cheese products, were a bunch of asparagus and real parmesan cheese (pricey stuff too).

We have an alcohol stove on the Time Machine and it’s great in that it runs on unpressurized non-scary fuel and doesn’t go through a ton, and it is so easy to deal with that a medium sized crustacean could probably figure it out. Unfortunately, it doesn’t really get all that hot. Browning things has always been a problem. Boiling a large kettle of water takes half a day. Now that we are temporarily installed in a house with all the modern conveniences, we can cook things over an electric stove—and I LUUUVV cooking on red. The other night I converted thirty-minute’s worth of carefully slivered garlics into a smoking black crater in about thirteen seconds. The power.

We love asparagus and one of our favorite cooking methods is to pan sauté it. If you are of the conscientious persuasion, you might not burn the crap out of it and it will turn out beautifully.

WHAT YOU NEED
Bundle asparagus, washed, ends trimmed, and chopped at an angle into 2-inch pieces.
Garlic. I love the stuff and use around half to a whole bulb. Cut into chunks (e.g., each clove into maybe three pieces).
Balsamic vinegar (maybe two tablespoons’ worth).
Red pepper flakes. The hot stuff.
Salt.
Pepper. Freshly ground; I like black pepper the best.
Parmesan cheese.

THE METHOD

Put a tablespoon or so of oil in a skillet over a mostly red burner, then add the garlic bits. Fry in the oil until they turn golden brown and are as done as you care them to be. It is difficult to flip the things; I use chopsticks. You are going for crispy on the outside, creamy on the inside. When ready, remove from the pan and set aside.

blackened garlic

[Hmm. Some of those are a little more done than I had anticipated. Do as I say not as I do: take yours off before they turn black and don’t waste time trying to get photos.]

Now add the asparagus and crank that burner to full red (you know, use your discretion). Saute for a while, stirring around so the asparagus cooks evenly; taste occasionally to get your preferred doneness (probably around ten minutes for me). When just done, turn the heat down to medium and add the balsamic vinegar, stirring so that it coats the asparagus and reduces away.

adding balsamic vinegar to asparagus

[Super action shot of balsamic addition. Nice and stir.]

Toss in a pinch of red pepper flakes and grind a bunch of pepper over the pan; add salt to taste and chuck the garlic back in as well. Mix around and kill the heat. Serve with fresh grated parmesan over the top.

adding pepper to asparagus

[More action photography. Can you believe that this stupid Safeway “disposable” pepper grinder is the best I’ve ever encountered? I’ve refilled it about a million times. Makes nice chunky pepper grinds, not that powdery shit I find so dissatisfying and takes forever to grind. Right after Joshua took the photo however, I inhaled a good snort of ground pepper from the steam and collapsed into a huge sneezing fit.]

Despite the overly cooked garlics (and, honestly, the asparagus could have been cooked with a lighter touch—I’m telling you though, taking cooking photos messes with your timing), the asparagus was awesome as usual and we snarfed it down before we could get any good pictures.

(By the way, this is the same way we cook green beans. Super excellent.)


Battle Expired Anchovy!

Thursday, December 21st, 2006

I did not think twice about provisioning a dozen tins of anchovies when I did our pre-departure Trader Joes run. Surely we would be eating Caesar Salad every night and would be out by San Diego. As fate would have it, lettuce lasts poorly without refrigeration and the romaine variety is all but nonexistent south of the California border.

Now, a year later, I have many, many tins of anchovies and they are all expired. More importantly, anchovies lose structural integrity after a year in the tin and turn into brown mush. Brown mush interspersed with wee bones. Let this be a lesson to you all.

But I am determined and stubborn–if not particularly foresightful–about such matters and so every one of these tins of anchovies must be used up at all costs. Soon.

What the hell do you do with anchovies if you can’t make Caesar salad? A good question indeed; one which I would love to ask the Internet but alas, there’s no internet here.

Answer #1: Anchovy and Olive (also expired) Surprise on Toasts!

Anchovies are not the only expired can around here; in addition, we have a can of imitation abalone that Joshua bought a few years ago thinking it was funny and which I have no idea what to do with. Also several cans of milk products: sweetened condensed, “table cream,” evaporated (which is actually liquid), dulce de leche, and lactose-free regular. Also, a small tin of those lame sliced black olives whose presence in our lives is a huge mystery.

We had a loaf of stale ciabatta to eat and so we wrapped the bread in foil and toasted it over the burner in a makeshift lean-to of various pots and pan lids.

Then I mixed minced garlic (two cloves), the can of anchovy mush (minus oil), the sliced olives further sliced, one tomato diced finely, grated parmesan cheese procured from an Italian deli populated with products from the actual country of Italy (this is what saved the dish), olive oil, pepper, and hot sauce. We ate this over the toast and it was quite tasty. Improvements could be made by using more exotic olives such as Moroccan oil-cured. Also, using fresh anchovies.

Answer #2: Warm Multi-Pasta Salad!

Flush from the success of the first Anchovy Battle, we did something very similar but with pasta. Many of the same ingredients went into the ‘sauce’: one large tomato diced, can anchovy sludge (sans oil), chopped green herbed olives (also about to expire, jeez!), garlic cloves (minced), tablespoon or so of balsamic vinegar, olive oil, basil, oregano, salt (only if necessary because the anchovies are already salty), pepper, and a pinch of chili flakes. Mix together and set aside. Boil water and make pasta of choice (we used an artful mixture of left-over elbows, penne, and shells). Mix together and voila!

Answer #3: Puttanesca Sauce!

Puta madre! Another tasty pasta creation that leaves me one more anchovy tin down.

Mash together: a couple of tablespoons of olive oil, half tin of anchovy filets (bonus: mine just happen to be already mashed; I also used the whole tin), three cloves crushed garlic. Now, take half of this mixture and sauté it with three chopped or crushed roma tomatoes until they are soft. Add the rest of the mashed sauce, two tablespoons of capers, half a cup of olives (like good ones, not those canned black pitted nasties), and pepper. You probably won’t need any salt after the olives and anchovies. Simmer over low heat an additional twenty minutes and finally serve over pasta. We used the last of our high-quality Jasmine penne. This would be excellent with a bit of parmesan grated over the top. If parmesan existed anywhere within a 100-mile radius of this boat. Which it doesn’t. So sad.

Answer #4: Miraculous Anchovy and Almond Tapenade (tossed with veggies)!

Jerry and Joni from Lotus gave us an awesome cookbook, which I highly recommend to anyone on a boat (The Cruising Chef by Mike Greenwald). The current revised edition is an excellent read with easy to deal with recipes introduced with great stories and much humor. Lotus had two copies and I ended up with an original first edition from 1977 and it is such a gem; it’s loaded with ink illustrations and delightfully un-PC recipes and stories (whale hunting! MSG!). I immediately scoured it for anchovy recipes and found this.

For veggies, I steamed some green beans until just about done. Then I fried a bunch of chopped almonds and several garlic chunks in butter until they started to turn slightly golden (the almonds take longer than the garlic so I suggest starting the almonds, then adding the garlic later unless you want crispy brown garlic pieces). Here is where you add chopped anchovy filets, according to Mike Greenwald. Here is where I diverged from the recipe. Gazing at my anchovy filets-turned-mush, a delicious almond-garlic-butter aroma wafting around the galley, I decided to just leave them out actually and I chucked the tin. I added the green beans and stir-fried them in the almond butter garlic, adding salt and pepper. Very tasty.

Answer #5: Happily Trashed Anchovy Tin!

Enough already. I’m sick of anchovies now.


Let’s Cooking = Pupusas

Thursday, November 16th, 2006

I may have mentioned a few thousand times about the dismaying blandness of Central American food, particularly after the richness and variety of Mexican cuisine. The mercados no longer offer a rainbow of hot peppers, even the ever-present chili poblano disappeared, only to be replaced by a lighter-green facsimile that has no apparent spice whatsoever. El Salvador cooking, however, in my vaguely biased opinion, is a bit more exciting in general but there is one shining gem that not only makes El Salvador a food destination, but nearly redeems all of Central America, just knowing this island of potential deliciousness exists. And this is the Pupusa.

Pupusas are like a stuffed tortilla, made either of corn or rice flour. We have found both rice and corn to be available nearly everywhere we’ve gone. They are about six inches in diameter, thick with fillings of cheese, beans, chicharrόn (fatty pork), or any combination thereof; a mixture of all three is called ‘revueltas.’ In San Salvador, you can often find cheese and ‘ayote,’ a grated squash, and these are particularly excellent. On the Estero, at Mar y Sol, we often ordered cheese and shrimp. Invariably it is served with ‘curtido,’ a shredded cabbage, carrot, and onion saurkraut-ish salad, as well as a mild tomato sauce. They cost from 25 cents on the street to 40 cents depending upon how ‘fancy’ the restaurant is; I can eat two. Frequently I think I want to eat three, but experience has taught me that I will be sorry and to always stick with two.

In San Salvador, particularly near the center or around the market, there are pupusa stands set up everywhere you look. They line the sidewalks of certain streets, one after another; some cooking corn pupusas and some cooking rice ones. Despite my corn intolerance, I broke down once (for the sake of science) and ate a couple of corn pupusas. I have to say the corn are perhaps a little better—I find they have a richer flavor, but typically I was forced for the sake of sanity and well-being to stick to the rice pupusas and many people prefer these to the corn.

Pupusa Stand. San Salvador, El Salvador

This woman had her pupusa stand set up a few blocks from the hotel we typically stayed in, near the technical university in San Salvador. The number of pupusa stands is staggering in this section of town and since she was on a side street off the major busy diesel-choked bus street, we generally made a beeline for her stand the moment we exited our hotel in the mornings. (Even so, avoiding busses is nearly impossible in this city, as you can see.)

You can see the large aluminum bowls of fillings; she makes two different sizes, the six-incher and another smaller one, of around four inch’s diameter. Most people seem to order the smaller size in the mornings, possibly because it is easier to eat with your hands. Pupusas are typically eaten with the hands; utensils are used only to scoop the curtido out of the jar. We would usually try to ask if they had any sort of utensils (we are not as skilled at not making a mess if we eat them with our hands; besides, they are always hot as hell to touch when they come off the grill) and this would be met with confused looks like, ‘just what are you going to DO with that fork?’ or sometimes a lengthy search resulting in one bent-up aluminum fork and one dusty plastic coffee spoon. We actually took to carrying around a couple of plastic forks wherever we went in case we needed a pupusa or two and this always killed the pupusa ladies; they would nudge each other at our curious gringo habits, we would give them a big goofy grin, and they would burst into raucous laughter.

Pupusa Stand. San Salvador, El Salvador

She was either assisted by her son or her husband (today is the son).

Pupusa Stand. San Salvador, El Salvador

The aluminum canister on the left is the coffee urn. Coffee, albeit brewed (not instant), is weak and much sugar is added. Sounds gross but we sort of developed a taste for it when we were in the city. The pupusa stands usually also have an urn of hot chocolate in the mornings. (Note the elaborate market apron; market women in El Salvador invariably wear one of these aprons, although generally they don’t have the bib part, just the skirt.)

Pupusa Stand. San Salvador, El Salvador

This was our other favorite street pupusa stand; they were located a block off the central square in the market and they always had cheese and ayote pupusas. The only problem is that they did not have tables set up—you had to take your pupusa to go wrapped in brown paper with a little plastic baggie of curtido and a baggie of tomato sauce.

PUPUSAS

(Dough)
* Rice flour or corn flour (masa). I’ve only tried this with rice flour, which can probably be found in the US in any sort of Co-op or Whole Foods type stores, at least.
* Water

To prepare:
For two pupusas per person, use 1/4 to 1/3 cup of rice flour (or masa, presumably) per person. Add water and mix until you have a dryish pasty consistency. Imagine something you might be able to ball up in your hands… That’s it; it’s insanely easy and I recommend making all the fillings, curtido, and tomato sauces in advance (and in quantity) and then putting together the dough at the last minute whenever you want to cook them.

(Fillings)
* Cheese. Salvadorian cheese, ‘quesillo,’ is a soft melting cheese and either comes mixed with flower buds, called ‘loroco,’ or loroco is added. I have not achieved consistency perfection yet with the cheese, but you must chop and blend it somehow with the flower buds until it becomes creamy, even sort of pasty. A possible US substitution might be a soft mozzarella, chopped and smashed to a more pasty consistency; chives could be mixed in or maybe minced squash blossoms would be good. (You need the pasty consistency when assembling the pupusas.)
* Beans. Basically, use refried beans. I would never make these from scratch due to the insane amount of time required and the profusion of ready-made refried bean products out there, but one obviously could. Again, you want a nice pasty consistency—not too watery.
* ChicharrÏŒn. I have done my best to ignore what is actually in chicharrÏŒn, but I must face my demons sometime so here it is. I thought it was always pork skin, but the consistency of the chicharrÏŒn we got in pupusas often seemed to have a shredded thing going, so I would say use some sort of fatty porky product and you will be safe. Chop the chicharrÏŒn into a pan with chopped onion and tomato and simmer until the veggies are soft and the majority of water has boiled off. Blend the mixture into a paste. (You might start to notice a trend here with the paste thing.)
* Ayote. I never found a recipe during online searches for ayote pupusas but I would guess that it could be prepared thusly: shred some sort of squash, like yellow crook-neck or you could try to find ‘ayote’ in a latin grocery. Simmer in a pan with a little oil and salt until it is tender and much of the water has evaporated. You can probably avoid mashing this one to a paste and just leave it a limp shredded heap.

Obviously this is an insane amount of preparation to make a few pupusas revueltas. Making the fillings you wish ahead of time and then keeping them in the refrigerator makes the most sense; you can then put together a pupusa or two whenever you feel like it. I’ve only personally made the cheese ones.

(Curtido)
* Cabbage. Shred into very fine strips; I try to keep mine in the 1/8-inch width range and maybe an inch or two long.
* Carrot. Peel and coarsely shred a carrot or two (depending upon how much curtido you intend to make). You want the carrot to add a sprinkle of color to the cabbage mixture, not equal parts; a 1:5 ratio perhaps.
* White onion. Chop some onion into thin slices; proportion-wise, you want less onion than carrot.
* Jalapeno. Slice some jalapeno (to taste).
* White vinegar.
* Water.
* Fresh oregano, coarsely chopped.
* Salt.

To prepare:
Admittedly, I have not been able to get my curtido to taste “right.” I don’t know why because the ingredients seem so straightforward. I highly recommend locating a Salvadorian woman and consulting with her about ingredients and ratios. At any rate, mix the vegetables and cover with vinegar and water, mixed half-and-half. Mix in an attractive amount of oregano; enough to taste it but don’t overwhelm the curtido. Add a pinch or two of salt (to taste) and set this aside in the refrigerator overnight or at least for several hours for the flavors to blend. Taste and adjust salt if necessary afterwards; you could add a pinch or two of sugar if the vinegar is too strong. Many of the curtido jars sitting on tables in San Salvador had a yellow color, as if a pinch of tumeric was added; I never found out what this was. The approximate amount of curtido required for one pupusa varies with individual tastes but I would estimate one cup of curtido per four pupusas.

(Tomato Salsa)
* Roma tomatoes. Or you could use canned.
* Chopped white onion. Some.
* Chopped green bell pepper. Some.
* Bouillon; chicken or vegetable, etc.
* Salt to taste (watch out if the bouillon used is already salted).

To prepare:
Simmer the tomato with the onion and pepper in broth until all is soft. Blend in a blender to create a smooth consistency. You want the final result to have a consistency somewhere between V-8 and pasta sauce.

ASSEMBLY

Set up all your bowls of preparation ingredients: dough, fillings, and a small bowl of oil. Heat a dry flat-bottomed skillet to approximate pancake-cooking temperature. If you measured out the flour on a per-person basis, you might visually or physically divide up the dough with a knife so you get an even amount for each pupusa—that way you don’t end up with a runty pupusa at the end, like I always do.

Rub some oil on your hands and grab up a blob of dough, rolling it around into a ball and then flattening it slightly into a concave shape reminiscent of a giant red blood cell (pardon the metaphor). Scoop up a smaller blob of filling (you want maybe a filling center 1/3 or 1/4 the volume of the dough)—either all cheese, half cheese and ayote, half cheese and beans, or revueltas: cheese, beans, and chicharrόn. The Salvadorian ladies do not make any attempt to mix the ingredients inside the pupusa; they smear a bit of one, another, and then another filling and then get on with the forming of the patty. Having a nice paste consistency of your filling ingredients is key for smoothly forming the pupusa. Trying to keep air pockets minimal, gently close your red blood cell over the filling with your hand, turning the thing gently. Ideal is to have an even-walled ball of dough over the fillings before flattening it into a patty; the Salvadorian ladies tend to overestimate the amount of dough required, then fold it into a purse shape over the fillings pinching off the top of excess dough. Now, gently flatten the ball into your six-inch pupusa, taking care not to explode the filling contents out the outer dough.

Place it upon the grill and continue forming more pupusas. I usually cheat and use the grill to continue flattening my pupusas. Cook until the side has a mild browning—you want the heat high enough so that it doesn’t take so long the dough gets dried out but then you don’t want to burn it. Flip and finish cooking on the other side.

Serve hot pupusas with the curtido at room temperature and the tomato salsa heated slightly. The curtido is scooped over the top of the pupusa and then the salsa spooned over this. You could also put hot sauce on it as well (like Tobasco or Marie Sharp’s). You may eat it with a fork, if you must.

Pupusa Stand. San Salvador, El Salvador

Decidedly pleased to have some pupusas in front of me.


Let’s Cooking: Joshua’s Pork Chop

Monday, November 13th, 2006

We used to prepare this all the time when we lived on actual land. Recently, Joshua’s dad Jeff visited us on the boat and after a week of largely vegetarian dinners, a general demand for MEAT was announced by the boys. We made Joshua’s Pork Chop and, as always, it turned out pretty darned good. We never had a recipe specifying exact ingredients amounts and so we’ve always winged it—a thing that sometimes brings out the bickering on my and Joshua’s part. I have always had little regard for precision in ingredient specifications and Joshua thinks he actually remembers exactly how much of everything he put in it the last time we made it. Anyway, that’s what the wine is for.

Ingredients, more or less
* Pork! Chops of pork! I make Joshua pick these out due to an irritating squeamishness on my part around supermarket displays of dead flesh. He usually homes in on the thick ones.
* Dehydrated wild mushrooms (like porcinis); or if you are lucky enough to have fresh ones, use those. Rehydrate in hot water or broth (don’t throw out the mushroom juice when you are done though).
* White wine, maybe a half cup (sauvignon blanc, or a dry sherry—not cooking sherry either, use something you wouldn’t mind actually drinking, like a fino or amontillado. We also used Spanish brandy once). In fact, pour yourself and your cooking partner a glass in preparation for the preparation.
* Onion, chopped.
* Much garlic, sliced into little garlic sliceys.
* Balsamic vinegar (or champagne vinegar, a substance I find tastes like acetone—and not in a good way—but that Joshua loves for some crazy reason so you’ll have to battle it out on this one out). OH! I have just now received confirmation from Joshua that “Sherry vinegar’s the best.” Definitive; there you have it.
* Scant spoon of sugar, possibly. It depends upon how much balsamic you put in and how sweet it is (you can adjust for taste near the end). You might have to sneak this one in as I do for Joshua because the combination of Pork and Sugar scrambles his brain.
* Bay leaf.
* Possibly a squeeze of lime or lemon juice—again, taste it and make your decision.
* Salt and pepper to taste.

Get out your best big frying pan. Joshua is in charge of the browning of goods because he is King of the Pork Chop and so I usually just humor him on this one. Heat some oil in the pan (we always seem to use olive oil because we’re cooking Neanderthals but something that has a higher burn point is obviously preferable) and proceed to burn the shit out of all the garlic I just spent all day slicing into cute, uniform little sliceroos. Swear vociferously and demand to be handed a slotted spoon with which to fish out smoking garlic chars while I roll my eyes in I-told-you-so smugness. Luckily I always chop four extra cloves and so the process gets repeated but with a more careful eye. This time, fish out golden, crisp garlic chippy-chips from the hot oil and set aside in an attractive auxiliary kitchen dish.

Now for the pork. You must brown the pork chop; or rather sear it—a task that is nearly impossible using an alcohol stove such as we have on the Time Machine but was a SNAP when we had an antique electric stove that had only two settings: lava-red and dull brown on only one part of one spiral. Browning the pork chop, again, is Joshua Territory. I stand aside and peer around his shoulder while topping off my glass of wine. Once the browning of the pork chop is complete (be careful not to cook it all the way through, yet), set it aside for the time being.

Now, add onions to the frying pan, chopped finely and uniformly by Yours Truly and whose perfection is scoffed at by Joshua, who is simply jealous that he is incapable of such mastery of the large-bladed knife. Fight over who gets to stir. Take several sips of wine.

Once onions are well browned, a task that takes all night if you let Joshua stir because he somehow feels that the cooking process is hastened if all onions are pushed to the outskirts of the frying pan rather than spread uniformly across the center, add the mushrooms. I have to backtrack a little here: While Joshua was pushing the onions all over hell and gone in the pan, one must take a break and wind down, for example by chopping mushrooms. Remove the mushrooms from the reconstituting liquid and chop finely (I do this because the mushrooms I use are often the Trader Joes “wild” mushroom mixture and so I try to marry random mushroom flavors as best as I can). Add this to the onions in the pan and let Joshua do what he will with them while you spring into action. SPICES! Chuck in a bay leaf! Pour in the remaining mushroom juice! Grind in some pepper! Add a splash of balsamic vinegar and tell Joshua it was his favorite champagne vinegar that you threw out four months ago! Toss your own glass of wine in the pan! Sneak a taste of the sauce so far. Distract Joshua’s attention (“LOOK! A condor!!”) whilst adding a smidge of sugar to the mix if it tastes a bit off; seize control of the wooden spoon to mix this around. I believe I’ve been known to add a pinch of thyme to this as well.

More wine. For you.

Now, add the pork chops back to the pan and reduce the heat to simmer. I generally see to it that each chop is carefully covered with a blanket of mushroom/onion mixture and that they are neatly arranged in the pan to finish cooking. This generally doesn’t take too much longer (five minutes, maybe) and while they finish up, you may cover the pan or leave it uncovered in order to reduce the sauce to an appropriate amount. Taste and adjust salt/pepper as you like. Add a squeeze of lemon or lime juice if it isn’t as tangy as you might like.

When they are finished (Joshua cuts into one and when the center is just a teeny bit pink, calls the cooking process done), remove from heat and serve, spooning the mushroom/onion mixture over the top with the juice. Sprinkle the garlic chips on top of this creation. We generally make a salad to go along with this. A Caesar salad, perhaps, using actual lettuce. Ohhhh. Good stuff.


Cheyenne Weil, Joshua Coxwell